View step-by-step guides to complete the most common tasks in Digital Banking. If you don't see what you're looking for, give us a call at 800.843.1552 or send us a message in Digital Banking, and we will be happy to help.
1. Log in to Digital Banking.
2. Select the account you want to enroll.
3. Select Statements & Notices.

4. Accept the terms.
5. Enter the email address where you want to receive notifications.
6. Select the account.
7. Finish by selecting Enroll.
Documents available for electronic viewing:
- Account Statements & Notices
- CD Renewal Notices
- Loan Statements & Notices
- Telephone Transfer Notices
- Account Analysis Statements
- Non-Sufficient Funds Notices
- Past Due Notices
- Check Images
- Tax Notifications
 Download Statements & Notices

3. Select the account for which you want to view statements and notices.
4. Download the statements and notices you need.
 Unenroll from Electronic Statements
1. Log in to Digital Banking.
2. Select the account you want to unenroll.
3. Select Settings.
4. Select Statements & Notices.
5. Uncheck the accounts you want to unenroll.
6. Select Save.
1. Log in to Digital Banking using a desktop or laptop computer.
2. Select Bill Pay.
3. Choose + New payee, and then select:
3. Choose + New payee, and then select:
- Company (to pay a bill); or
- Person (to send money to a person).
4. Follow the prompts and provide the required information.
 Bill Pay: How to Pay a Bill or a Person
1. Log in to Digital Banking using a desktop or laptop computer.
2. Select Bill Pay.
3. Select the payee and enter the amount.
3. Select the payee and enter the amount.
4. Click Submit.
 Bill Pay: How to Delete a Payee
1. Log in to Digital Banking using a desktop or laptop computer.
2. Select Bill Pay > Manage payments > Payees (tab at top).
3. In the Payee list, you will see the option to Delete.
 Bill Pay: How to Edit a Payee
1. Log in to Digital Banking using a desktop or laptop computer.
2. Select Bill Pay > Manage payments > Payees (tab at top).
3. Select Edit next to the payee’s name.
4. Make the changes, and then click Submit.
 Bill Pay: How to Delete a Payment
1. Log in to Digital Banking using a desktop or laptop computer.
2. Select Bill Pay > Manage payments.
3. In the Pending list, click Edit next to the payment.
4. If it’s a:
- One-time payment, toggle
 "I would like to stop this payment."
 - Recurring payment, choose to Skip, Edit the single occurrence, or Edit the entire series.
5. Finish by clicking Submit.
 Bill Pay: How to Set Up eBill
1. Log in to Digital Banking using a desktop or laptop computer.
2. Select Bill Pay in the left-hand menu.
3. Select Manage payments on the far right.
3. Select Manage payments on the far right.

4. Under Pay to, select the Payee you want to set up with eBill.
If your payee is eligible for eBill, you'll see the Set up eBill button.

Note: If your payee is not eligible for eBill, you will not see the Set up eBill button.
5. You may be prompted to enter the credentials that you would use to log in to your biller site, your account number on your statement, and the ZIP Code of your payee. The payee may require other information to verify your identity. This prompt depends on the payee and what they need from you for you to register to receive your bill electronically. A benefit of an eBill is that you may also receive payment confirmations from the payee when the payment is received. This depends on the payee and if they offer payment confirmations. Note: Be sure you know your credentials and your account number to set up your payee without an error.
6. Select Accept and submit.
1. Log in to Digital Banking.
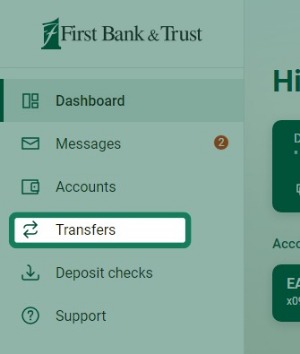
2. Select Transfers in the left-hand menu.
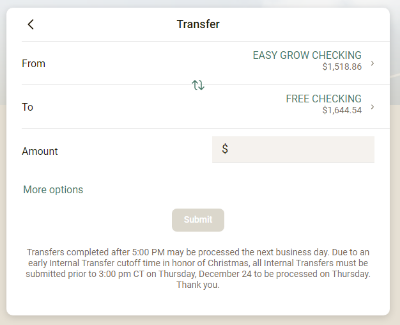
3. Select Make a transfer.
4. Choose the accounts you want to transfer funds from and to, and enter the amount. (OPTIONAL: Set the frequency and date under “More options.”)
5. Click Submit.
 Add an External Account for Transferring Funds
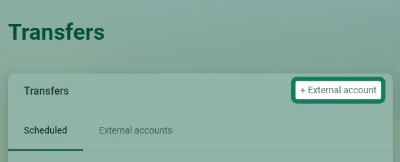
3. Select + External account.
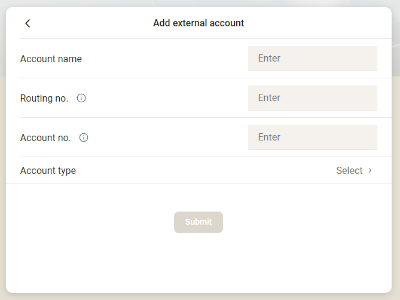
4. Enter the external account information.
5. Click Submit.
6. To verify ownership of the external account, two micro-deposits will appear in your external account. Once they appear, you will need to log in to Digital Banking and enter the two amounts to complete the external account setup.
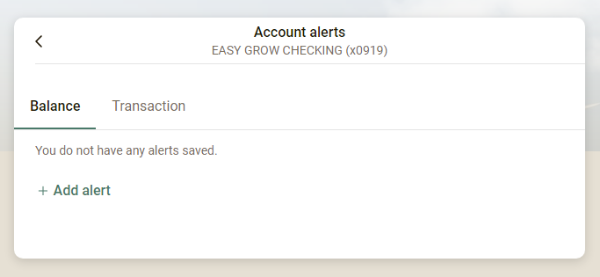
2. Select the account for which you want to set up or manage alerts.
3. Select Alert preferences.
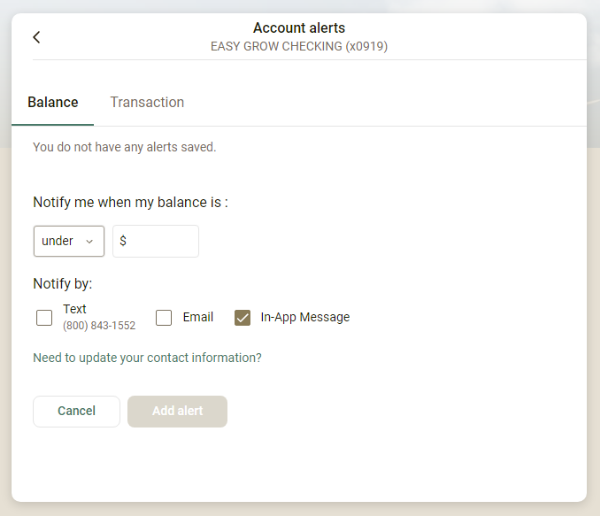
4. Click +Add alert under “Balance alerts” or “Transaction alerts.”
5. Enter and select your preferred settings, then click Add alert.
 Manage Account Alerts
1. Log in to Digital Banking.
2. Select the account for which you want to set up or manage alerts.
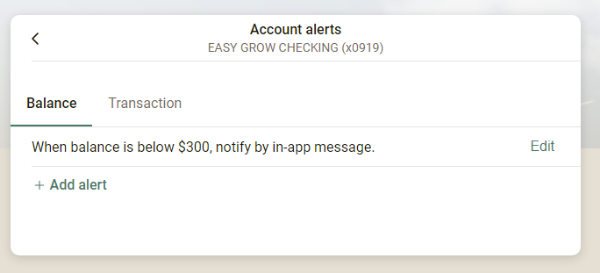
3. Select Alert preferences.
5. Click Edit next to the alert you want to view or update.
1. Log in to Digital Banking.
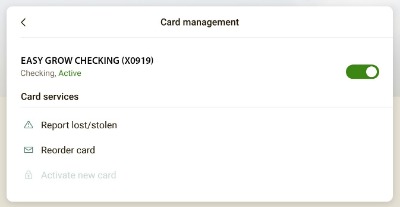
2. Select the account for which you want to manage your card.
3. Select the card under Card management.
4. Choose the action relevant to your need:
- Lock/unlock the card using the toggle

- Report the card as lost/stolen
- Reorder the card
- Activate a new card
 Enter a Debit Card Travel Notice
1. Log in to the Digital Banking mobile app.
2. Scroll to the bottom of the dashboard to Card Management.
3. Select the airplane icon next to Card management.
4. Select + Add travel notice.
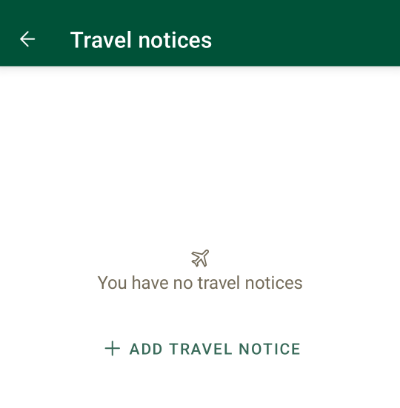
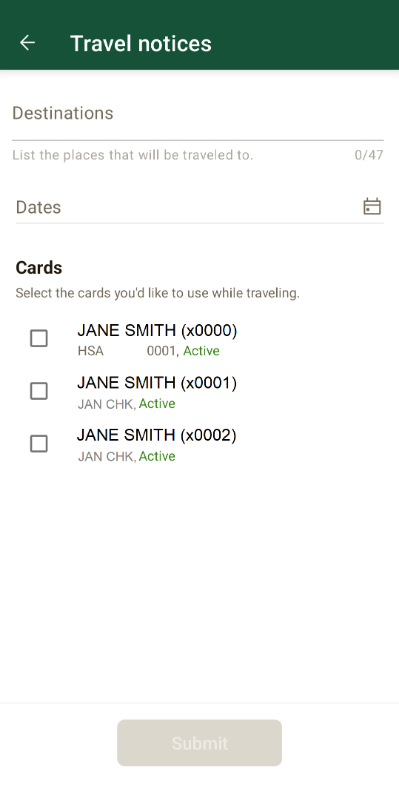
5. Enter the Destinations you will visit and/or travel in.
6. Select your travel Dates.
7. Select the card(s) for which you are adding this travel notice.
8. Select Submit/Save.
 Edit an Existing Debit Card Travel Notice
1. Log in to the Digital Banking mobile app.
2. Scroll to the bottom of the dashboard to Card Management.
3. Select the airplane icon next to Card management.
4. Select Edit next to your existing travel notice.
5. Make the necessary updates.
6. Select Submit/Save.
 Delete a Single Existing Debit Card Travel Notice
1. Log in to the Digital Banking mobile app.
2. Scroll to the bottom of the dashboard to Card Management.
3. Select the airplane icon next to Card management.
4. Select Edit next to your existing travel notice.
5. Select the Trash Can in the top right corner.

6. Select Delete.
 Delete ALL Existing Debit Card Travel Notices
1. Log in to the Digital Banking mobile app.
2. Scroll to the bottom of the dashboard to Card Management.
3. Select the airplane icon next to Card management.
5. Select the Trash Can in the top right corner.

6. Select Delete All.
 Set Up & Modify Debit Card Alerts and Protections
1. Open the Digital Banking app.
2. Select the account for which you want to manage your card.
2. Select the account for which you want to manage your card.
3. Select the card under Card management.
4. Select Alerts and Protections.
You can also add the “Card management” tile to your dashboard by scrolling to the bottom of the dashboard and clicking Organize dashboard.
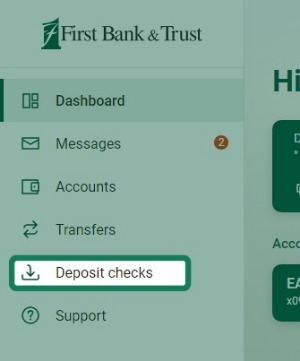
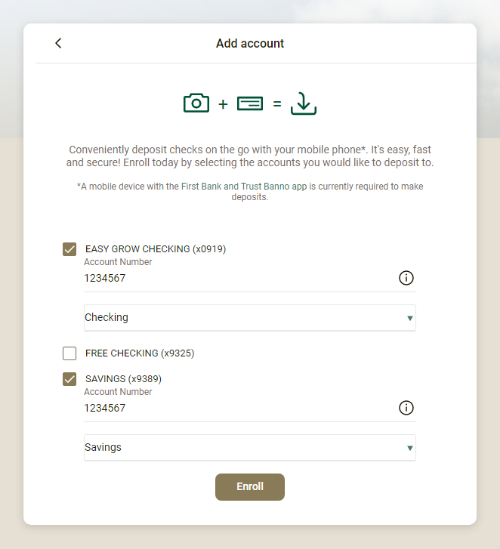
3. Select the account(s) you want to enroll, and enter the account number(s).
4. Select Enroll.
1. Log in to Digital Banking.
2. You may need to add My Credit Manager to your dashboard. To do this, select Organize dashboard from the bottom of your dashboard and choose Add a card.
3. Once it’s added, select See more and follow the on-screen instructions to complete the enrollment process.
Add cards:
1. Log in to Digital Banking.
2. Go to Organize dashboard at the very bottom of your Digital Banking dashboard.
3. Select Add a card.
4. Select the card you want to add.
5. Select Done in the top corner.
Remove cards:
1. Log in to Digital Banking.
2. Go to Organize dashboard at the very bottom of your Digital Banking dashboard.
3. Select the "X" next to the card name.
4. Select Done in the top corner.


